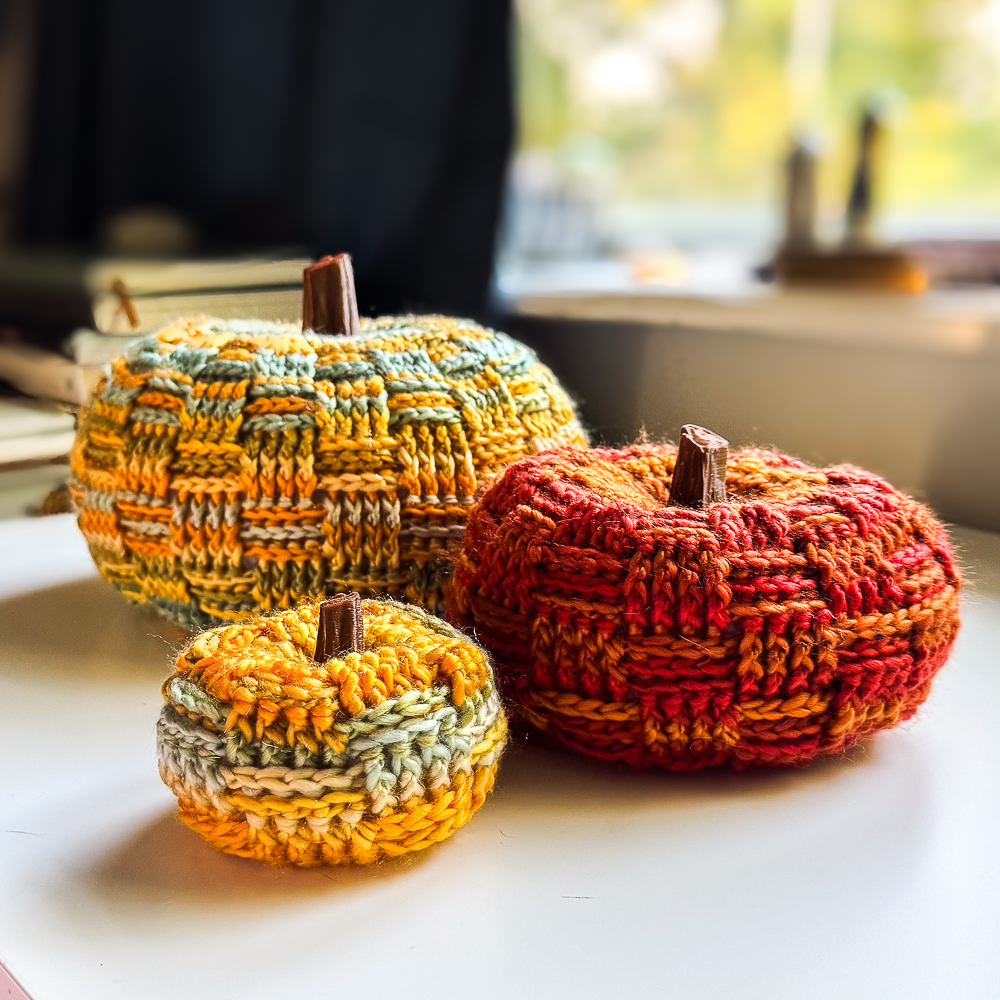
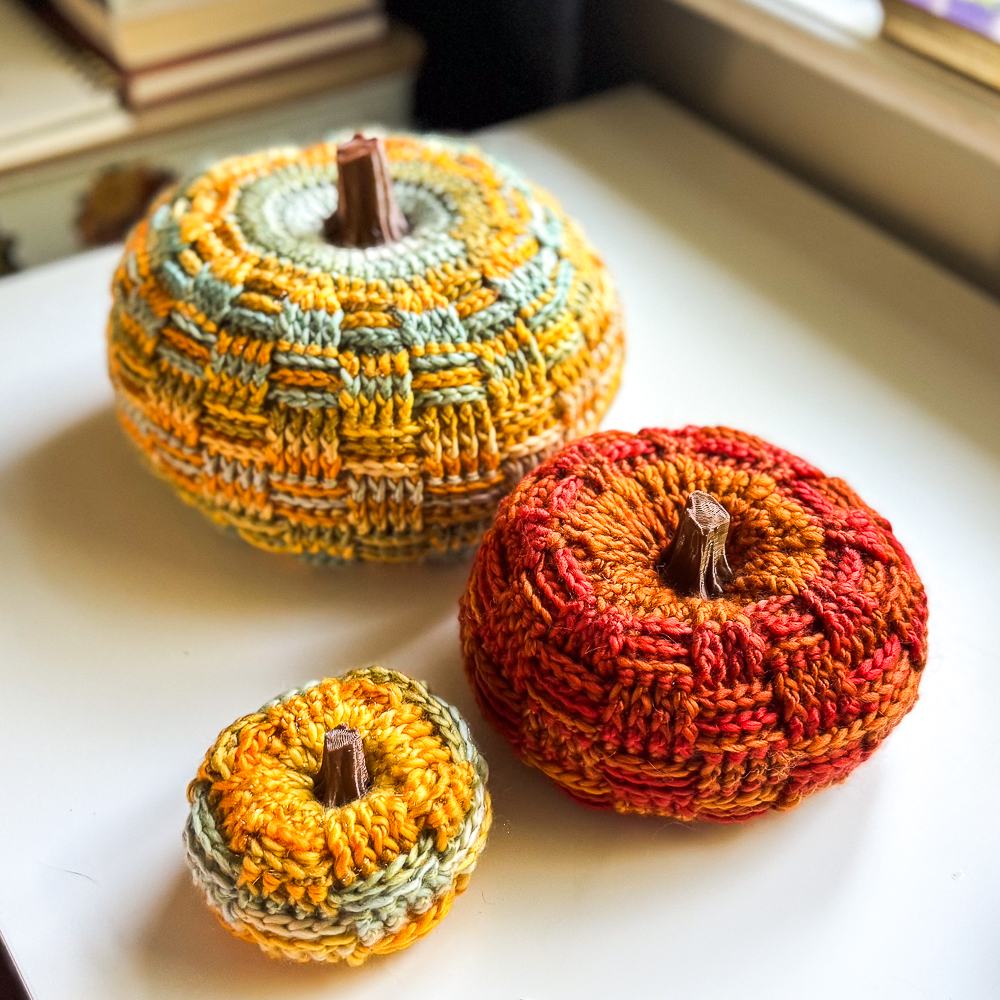
It’s mid July and I am tired of the heat, so it’s time to dream about Fall and crisp evenings, sweatshirt weather, and PUMPKINS!
Today I am sharing the small checkered pumpkin here on the blog but if you’d like to make the medium and large sized pumpkin check out my ad-free PDF on Etsy, Ravelry, or Ribblr.
Want a video tutorial? Check out my Youtube, I have created two videos, one for left handed crocheters (like me) and one for right handed crocheters. Click the images below.
Need pumpkin stems? Check out the 3D Printed pumpkin stems that my husband, Zach created for my pumpkins. They are now available in my shop and you can get them in 3 different sizes.
– Materials –
300 yds Heavy Worsted/Aran
I used Loops and Threads Facets 4 mm Hook
Fiber Fill
Tapestry Needle Scissors
– Abbreviations –
r – round
ch(s) – chain(s)
st(s) – stitch(es)
DC – double crochet
FPDC – front post double crochet BPDC – back post double crochet 2tog – crochet 2 sts together
– Gauge –
16 sts x 9 rows = 4 inches, worked in DC.
– Notes –
- Pattern is worked in continuous rows, do NOT join at the start of each round, unless instructed to.
- Ch2 does NOT count as a stitch.
- When the number is in front of the stitch (2DC) place 2 DC in one stitch. When the number follows the stitch (DC 4) DC crochet across 4 stitches.
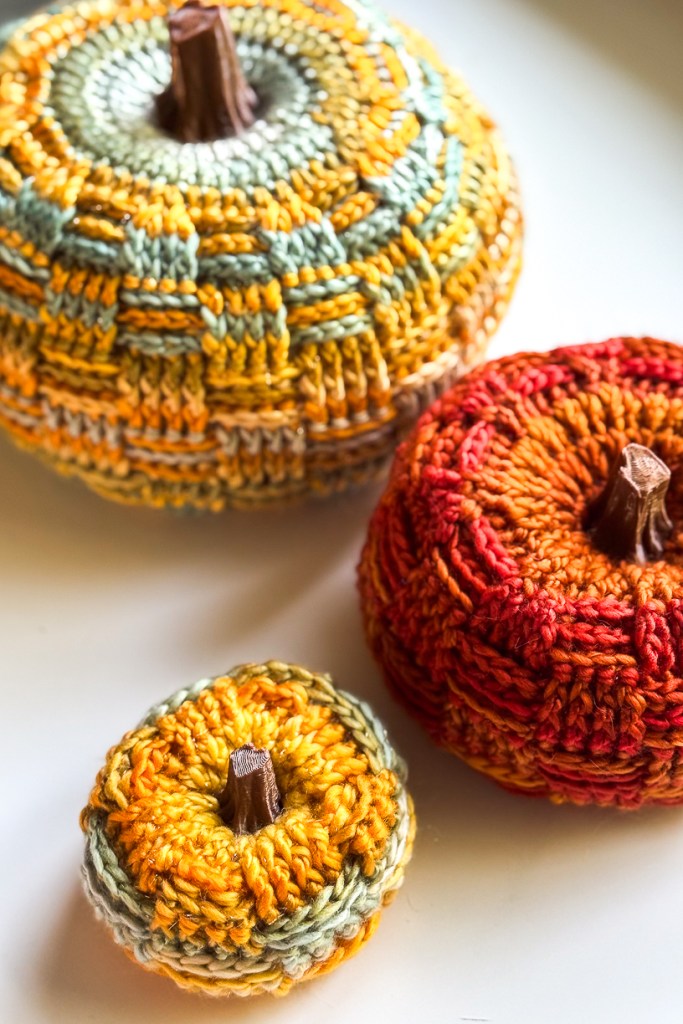
- Finishing touches: A pumpkin ins’t complete without a stem. You could use part of a stick/branch, cork, cinnamon stick and even decorate with twine or ribbon. I use 3D printed stems that my husband printed that you can find in my Etsy shop.
- To create indent: sew tail through center and out the beginning opening/magic ring, sew around a stitch and place needle back through center to cinched opening pulling some what tight to pull ends together. Feel free to loop back and fourth a few times then weave in end.
– Pattern | Small-
R1: Magic ring, ch2, 12DC, join. (12 sts)
R2: Ch2, 2DC in each st around, join. (24 sts)
R3: Ch2, (2DC, DC 2) around, join, ch2. (32 sts)
R4: (FPDC4, BPDC4) repeat around. (32s sts)
R5: Repeat R4.
R6: (BPDC4, FPDC4) repeat around. (32sts)
R7: Repeat R6.
R8: (FPDC4, BPDC4) repeat around. (32s sts)
R9: Repeat R8.
R10: (BPDC4, FPDC4) repeat around. (32sts)
R11: (BPDC2tog, BPDC2tog, FPDC4) repeat around. (24 sts)
Fill pumpkin with stuffing/fiber fill.
R12: DC2tog around. (12 sts)
R13: DC2tog around. (6 sts)
Finish off with a long tail and sew around opening to cinch close.
To create indent: sew tail through center and out the beginning opening/magic ring, sew around a stitch and place needle back through center to cinched opening pulling some what tight to pull ends together. Feel free to loop back and fourth a few times then weave in end.
Lastly add a stem! You can use a stick, cinnamon stick, or check out the 3D printed stems in my shop that I used in my pictures!
Thank you so much for checking out my blog! Feel free to tag me in any of your pumpkin posts, I’d love to see how it turned out. ❤
Thanks so much for being here.
Corrine

Leave a Reply